NotesnookHELP
Recovering your account
Notesnook is one of the few end-to-end encrypted software that allows users to recovery their account in case they forget their passwords. Here is a detailed step-by-step guide into how you can recover your Notesnook account.
You will be logged out
For account recovery to work reliably, you will be force logged out from all your other devices. It is recommended that you save & backup all your data on your other devices before continuing.
Requesting an account recovery link
The first step to recovering your account consists of requesting an account recovery link. Notesnook sends the recovery link on your registered email. Here’s how you can do that:
The new login flow
The recent versions of Notesnook have updated the login flow. It is now mandatory to verify your 2FA before you can request an account recovery link.
- Go to Notesnook Login page
- Enter your email & continue
- Verify your 2FA & continue
- On the next page, click on
Forgot password?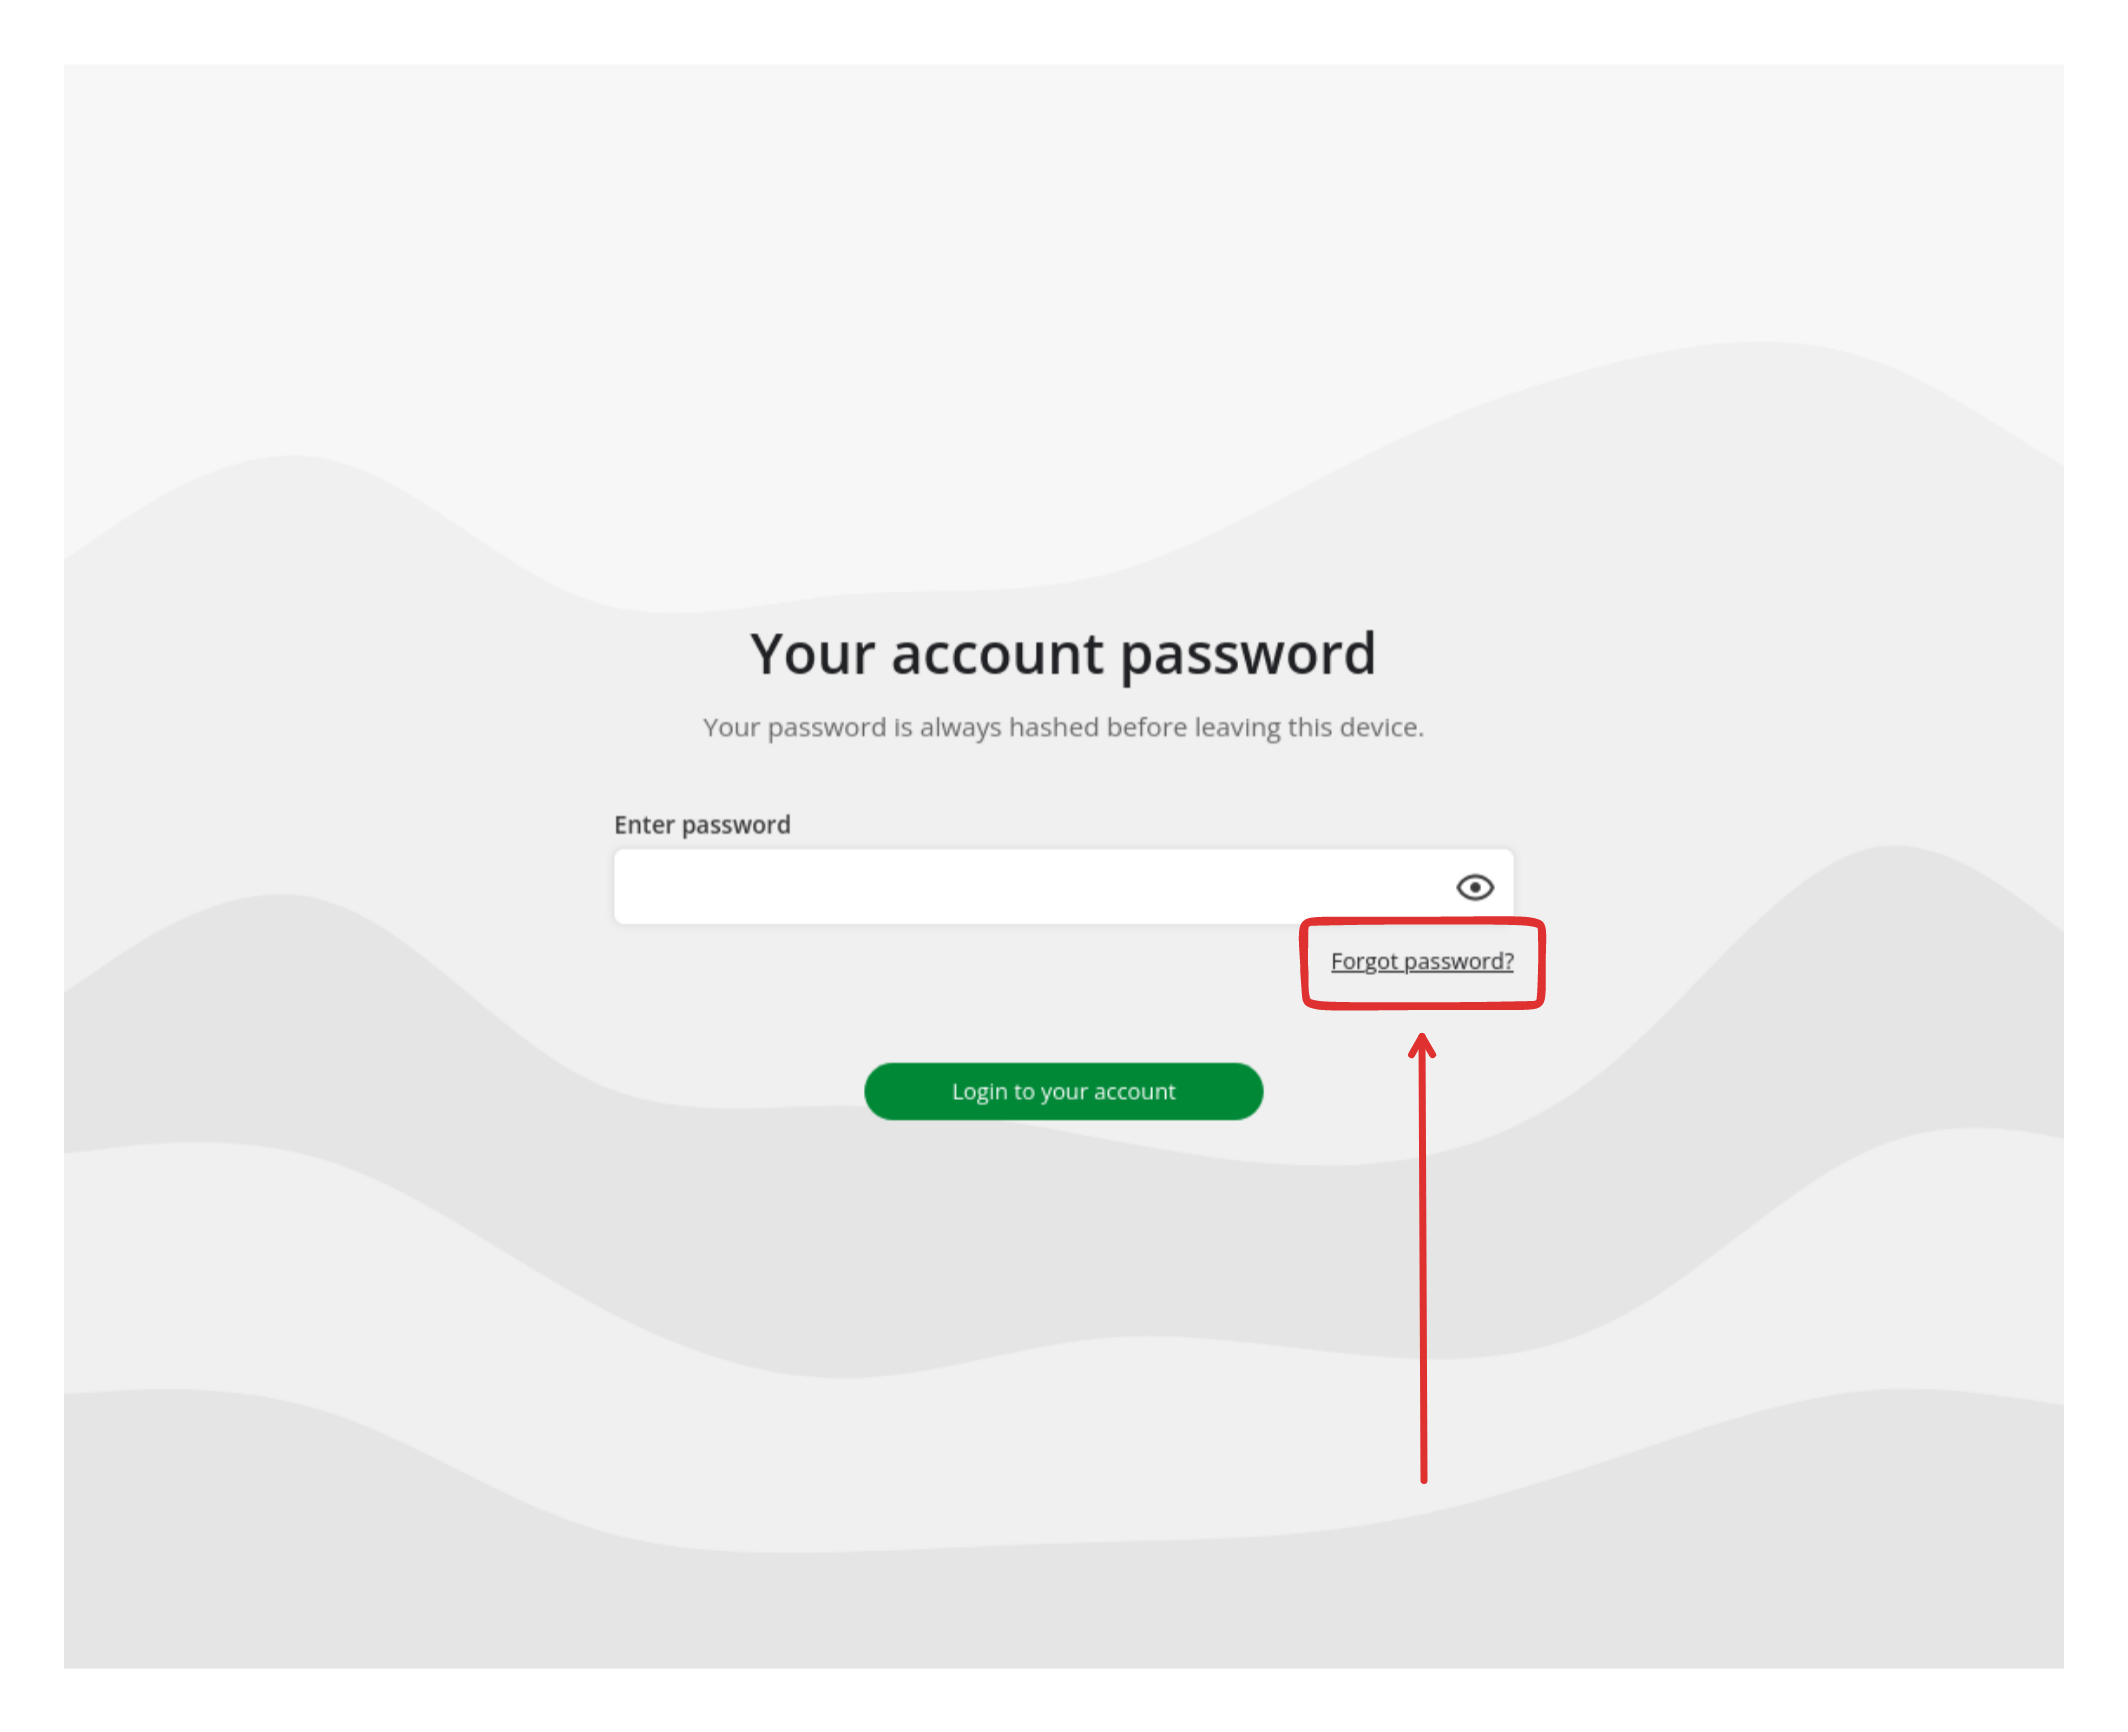
- On the next page, your email should be prefilled. If it isn’t, fill it out.
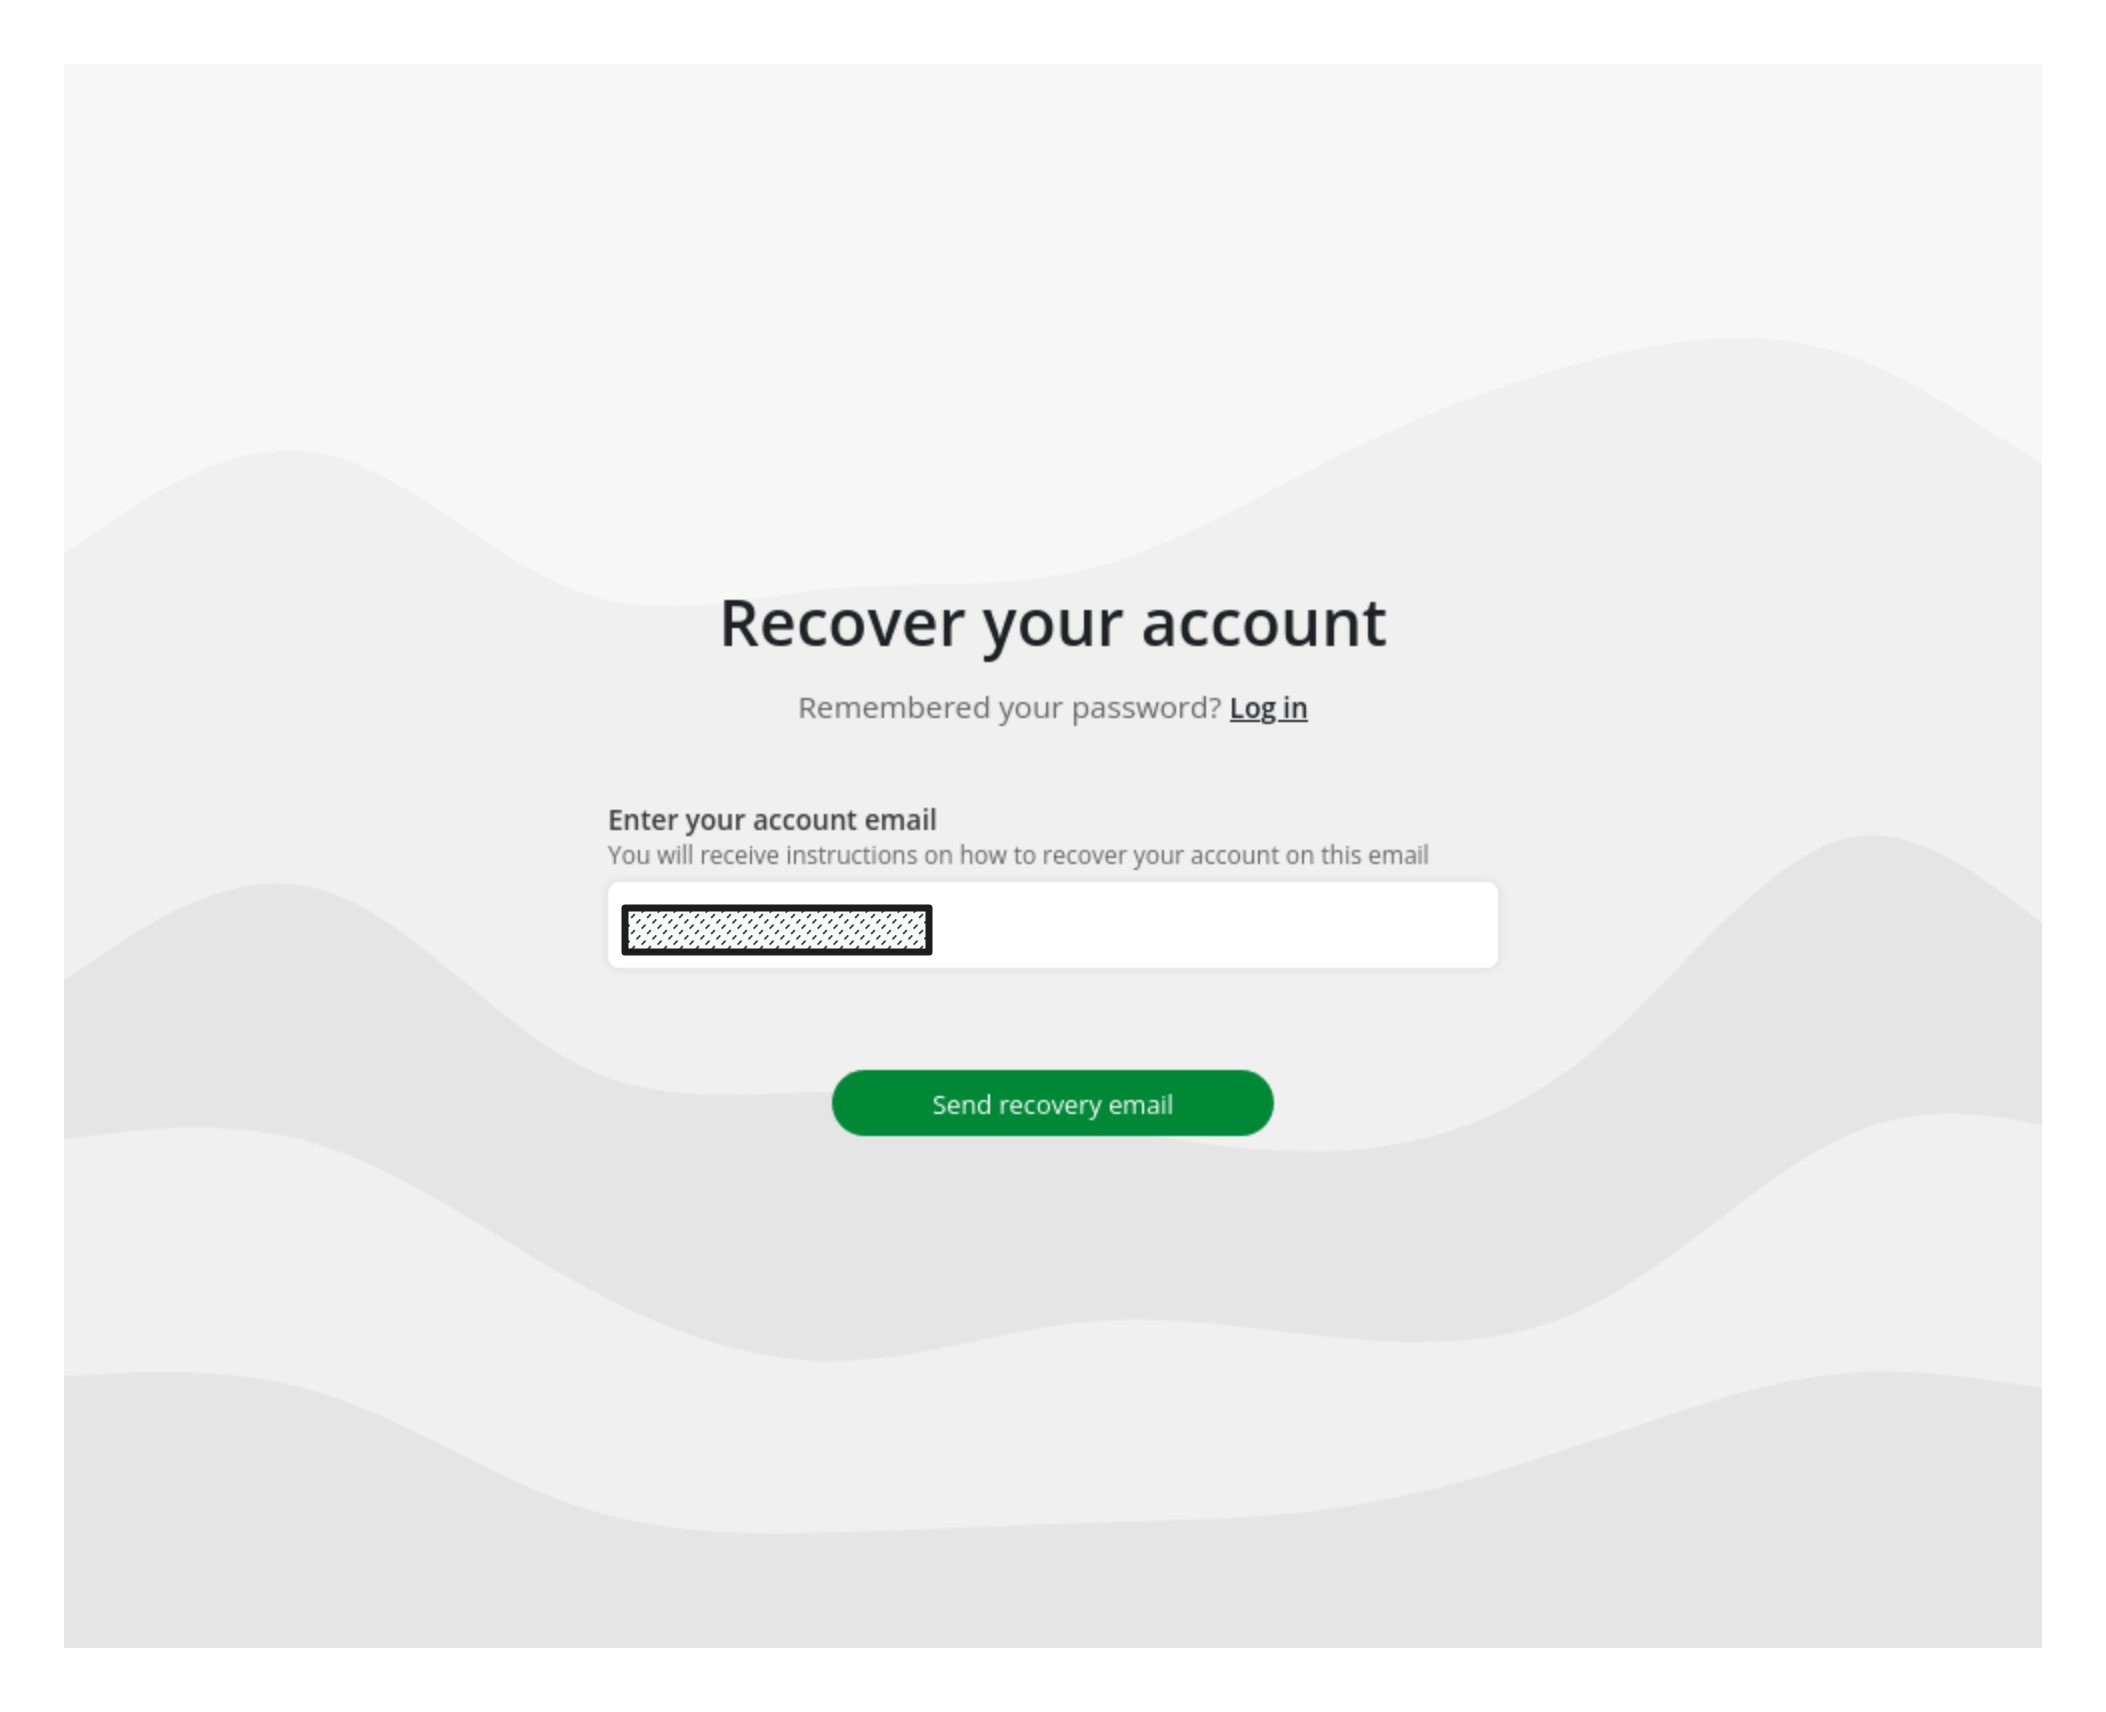
- Click on
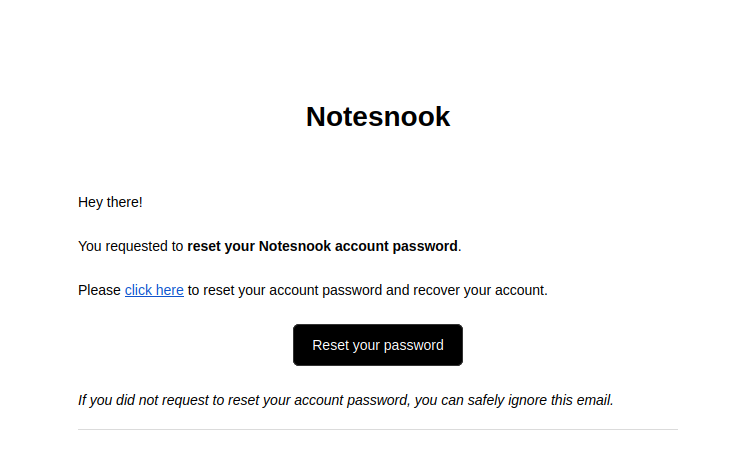
Send recovery email - If everything goes well, you should receive an email from Notesnook in your inbox:
What if I didn’t receive an email?
Check your spam/junk folder if you haven’t received one & contact us if you still don’t find it.
- Click on
Reset your passwordbutton in the email. This will take you to the account recovery page.
- Open the Notesnook app
- Go to the Login page
Choosing an account recovery method
Notesnook gives its users a variety of recovery methods depending on the data they have:
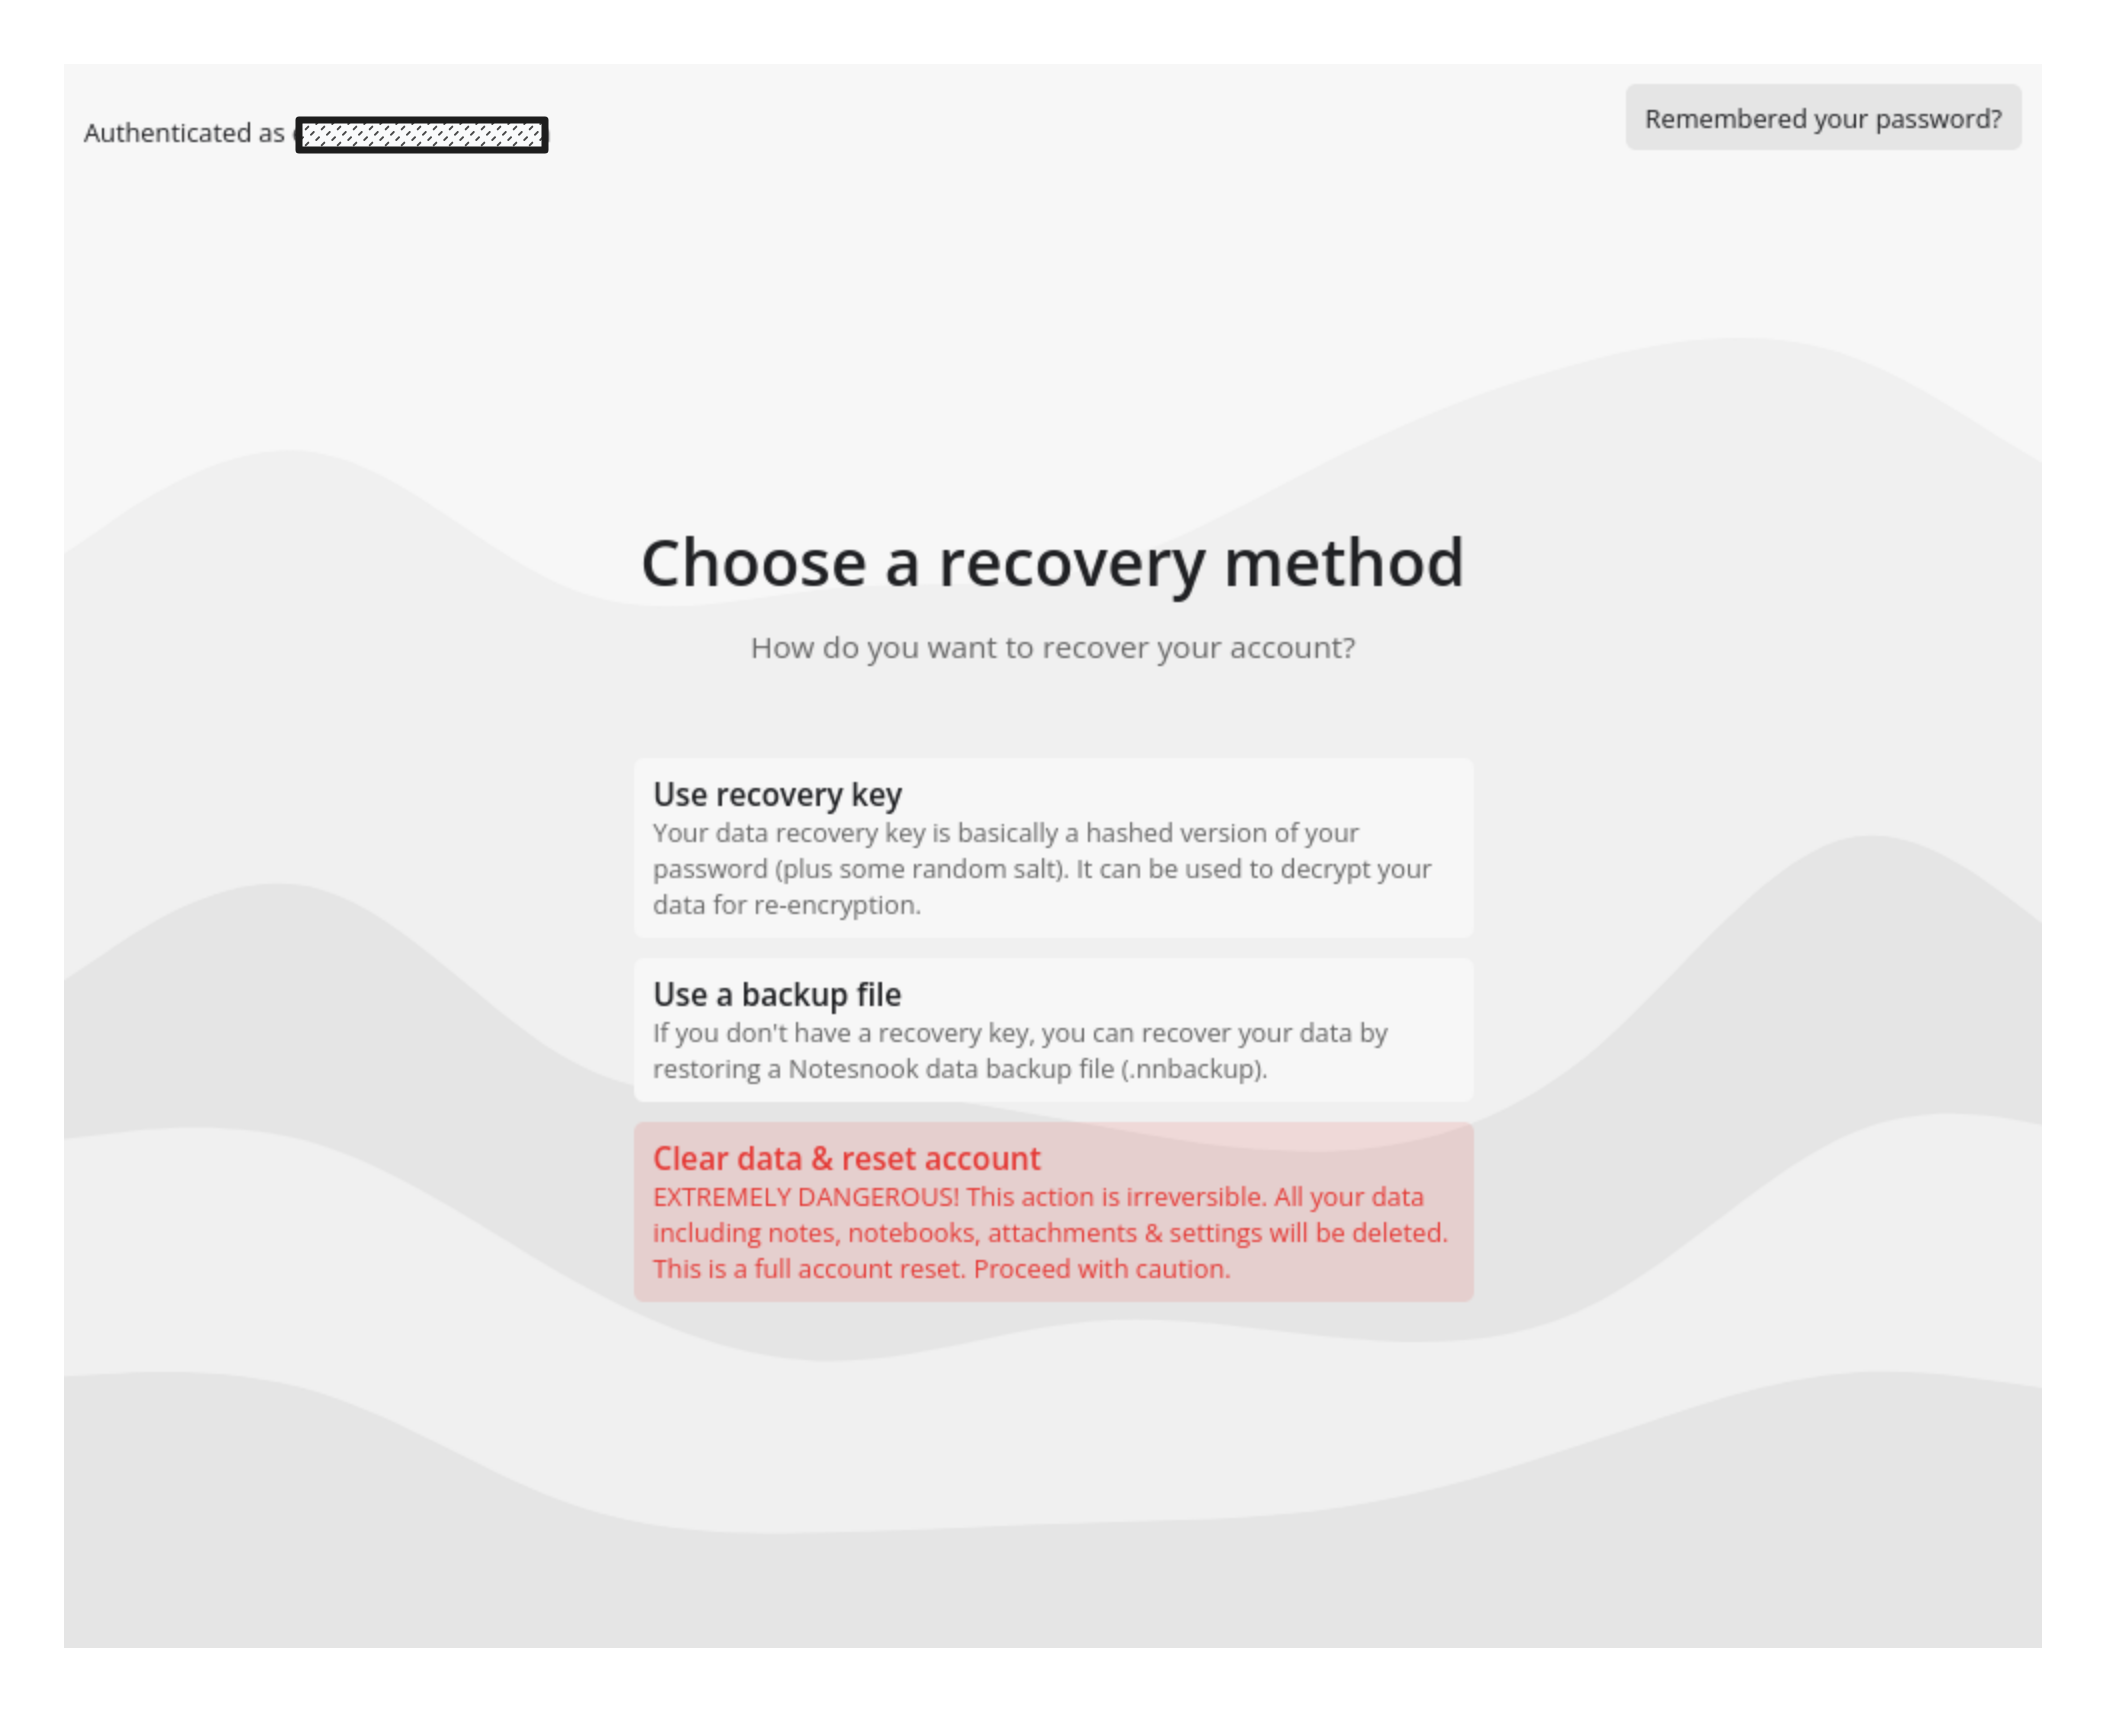
Use recovery key
This is the safest method of recovering your account because it just decrypts your data using your old key & then re-encrypts it using the new password.
Don’t have a recovery key?
If you don’t have your data recovery key, you can skip to the next section.
- Click on the first option (the button that says
Use recovery key) if you haven’t already - Enter your recovery key in the input field & click on
Start account recovery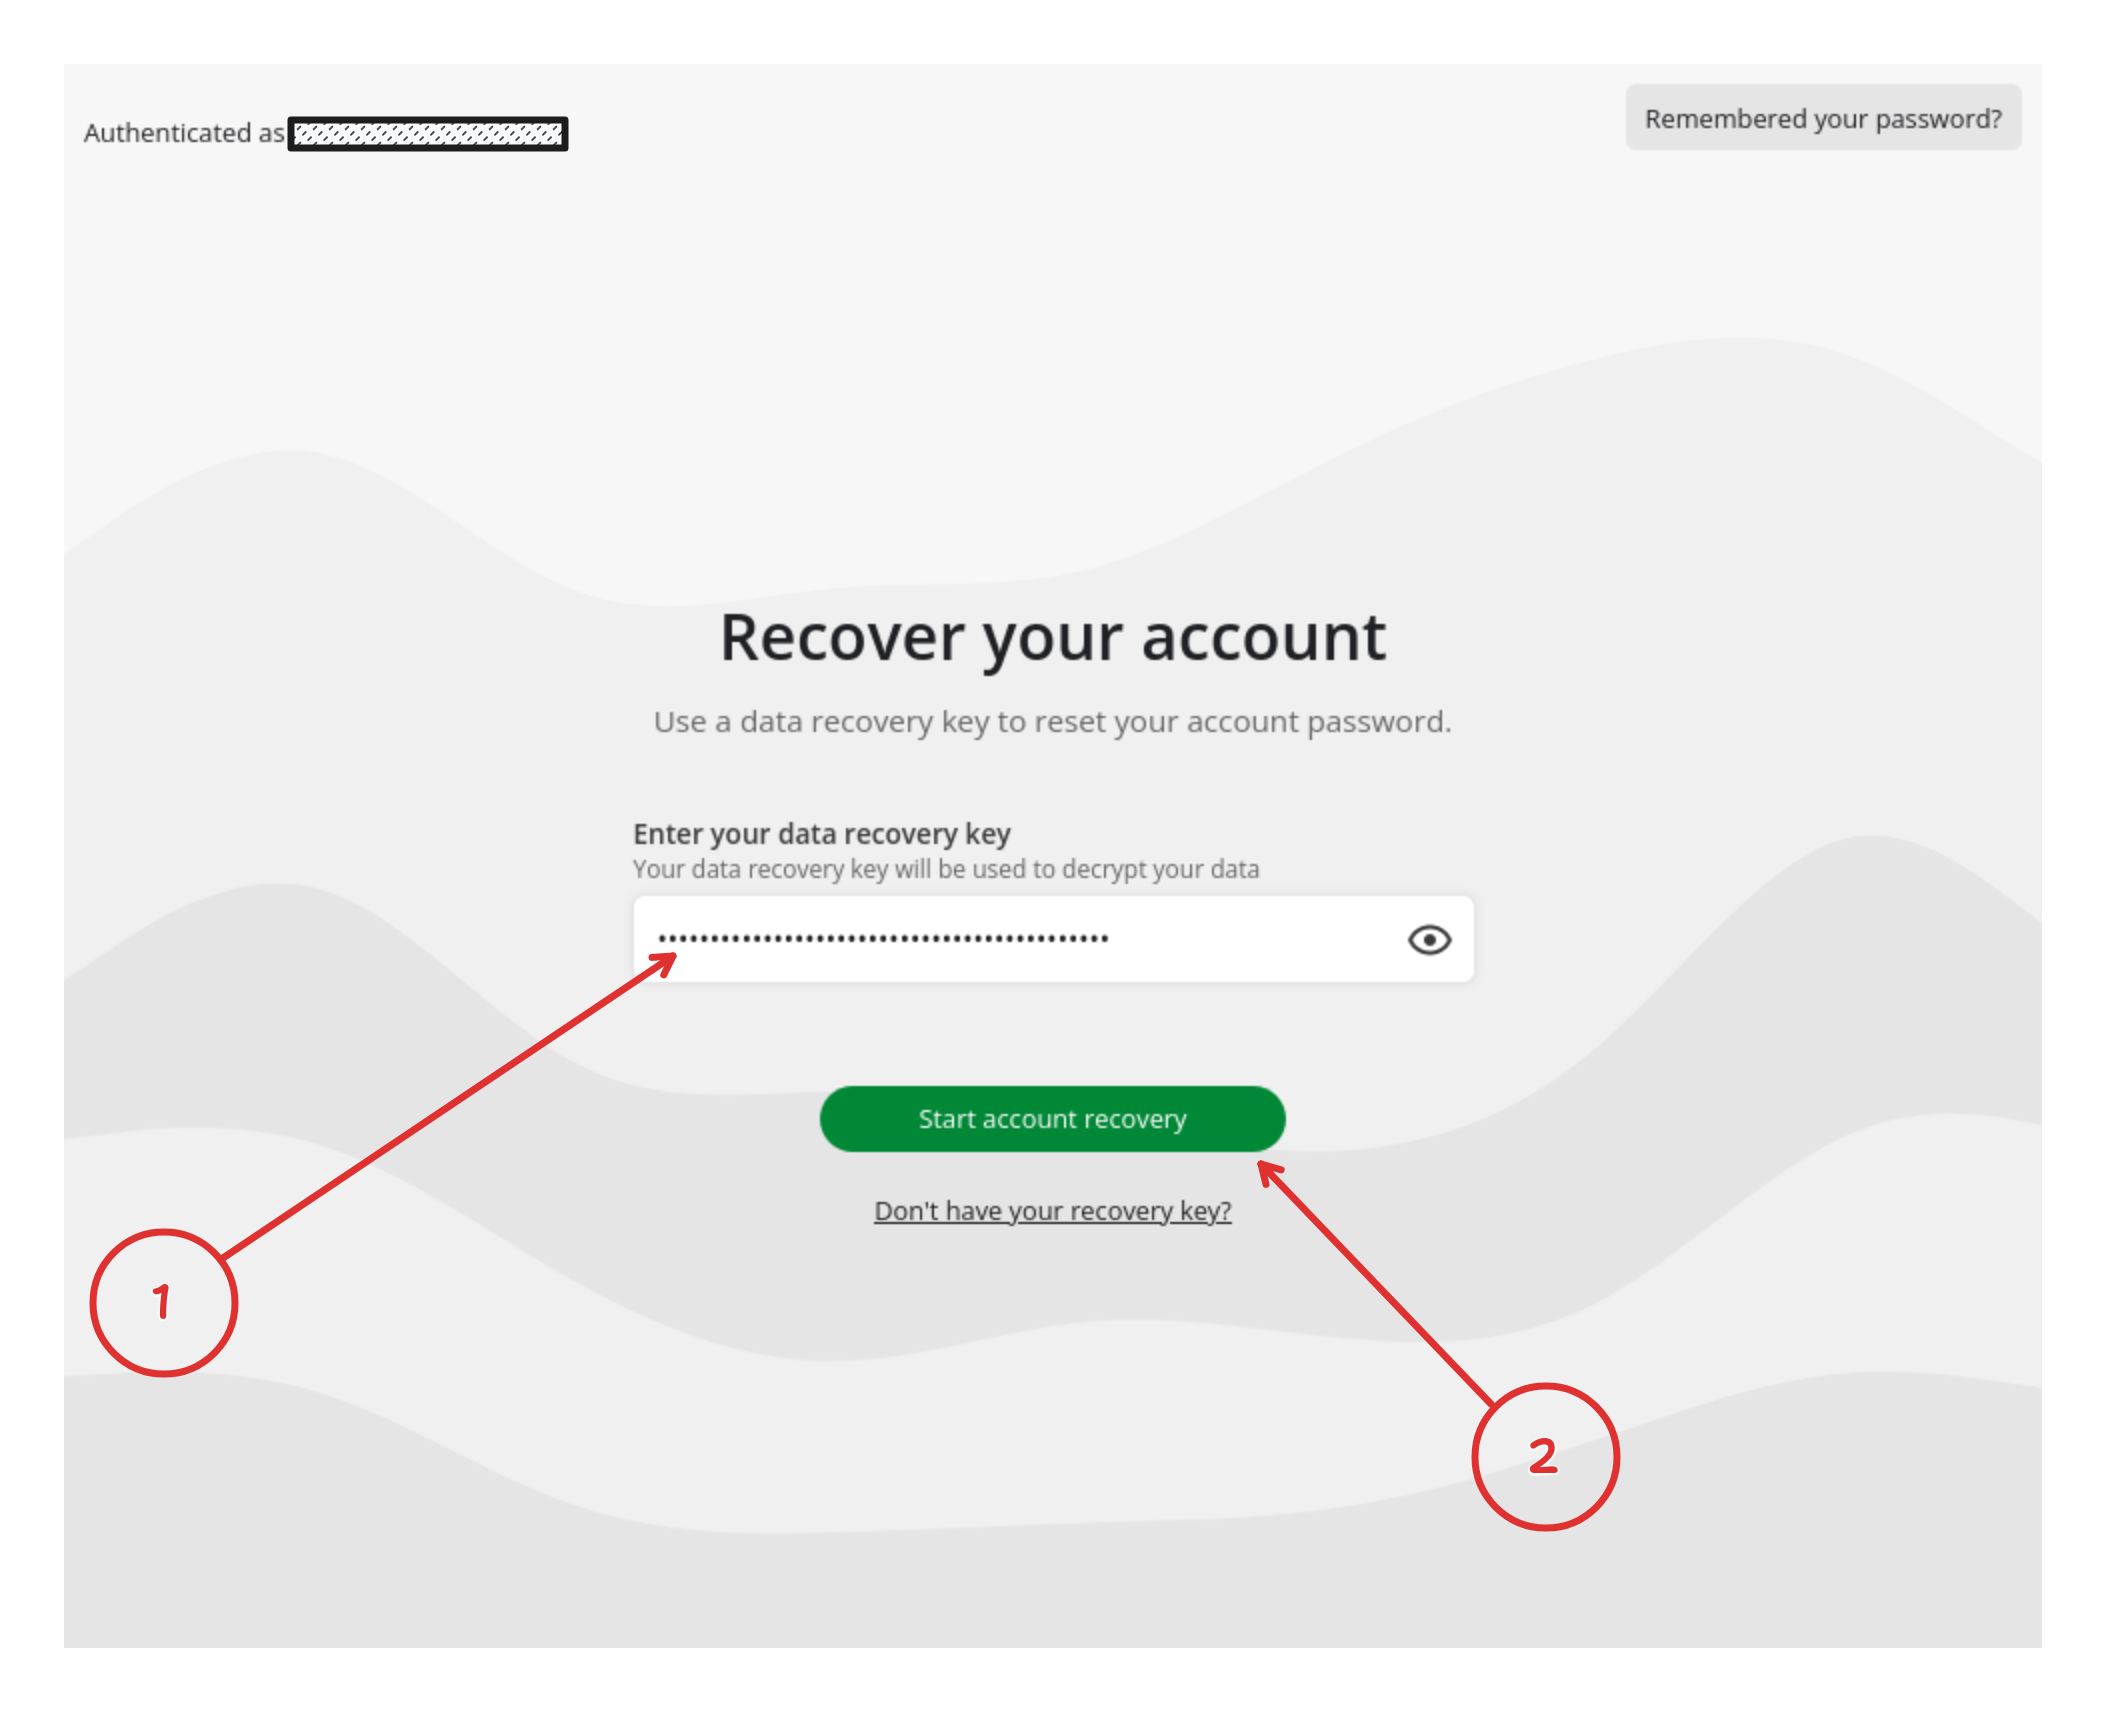
- Click on
Download backup fileonce you data has been downloaded. Don’t forget to save the file in a safe place.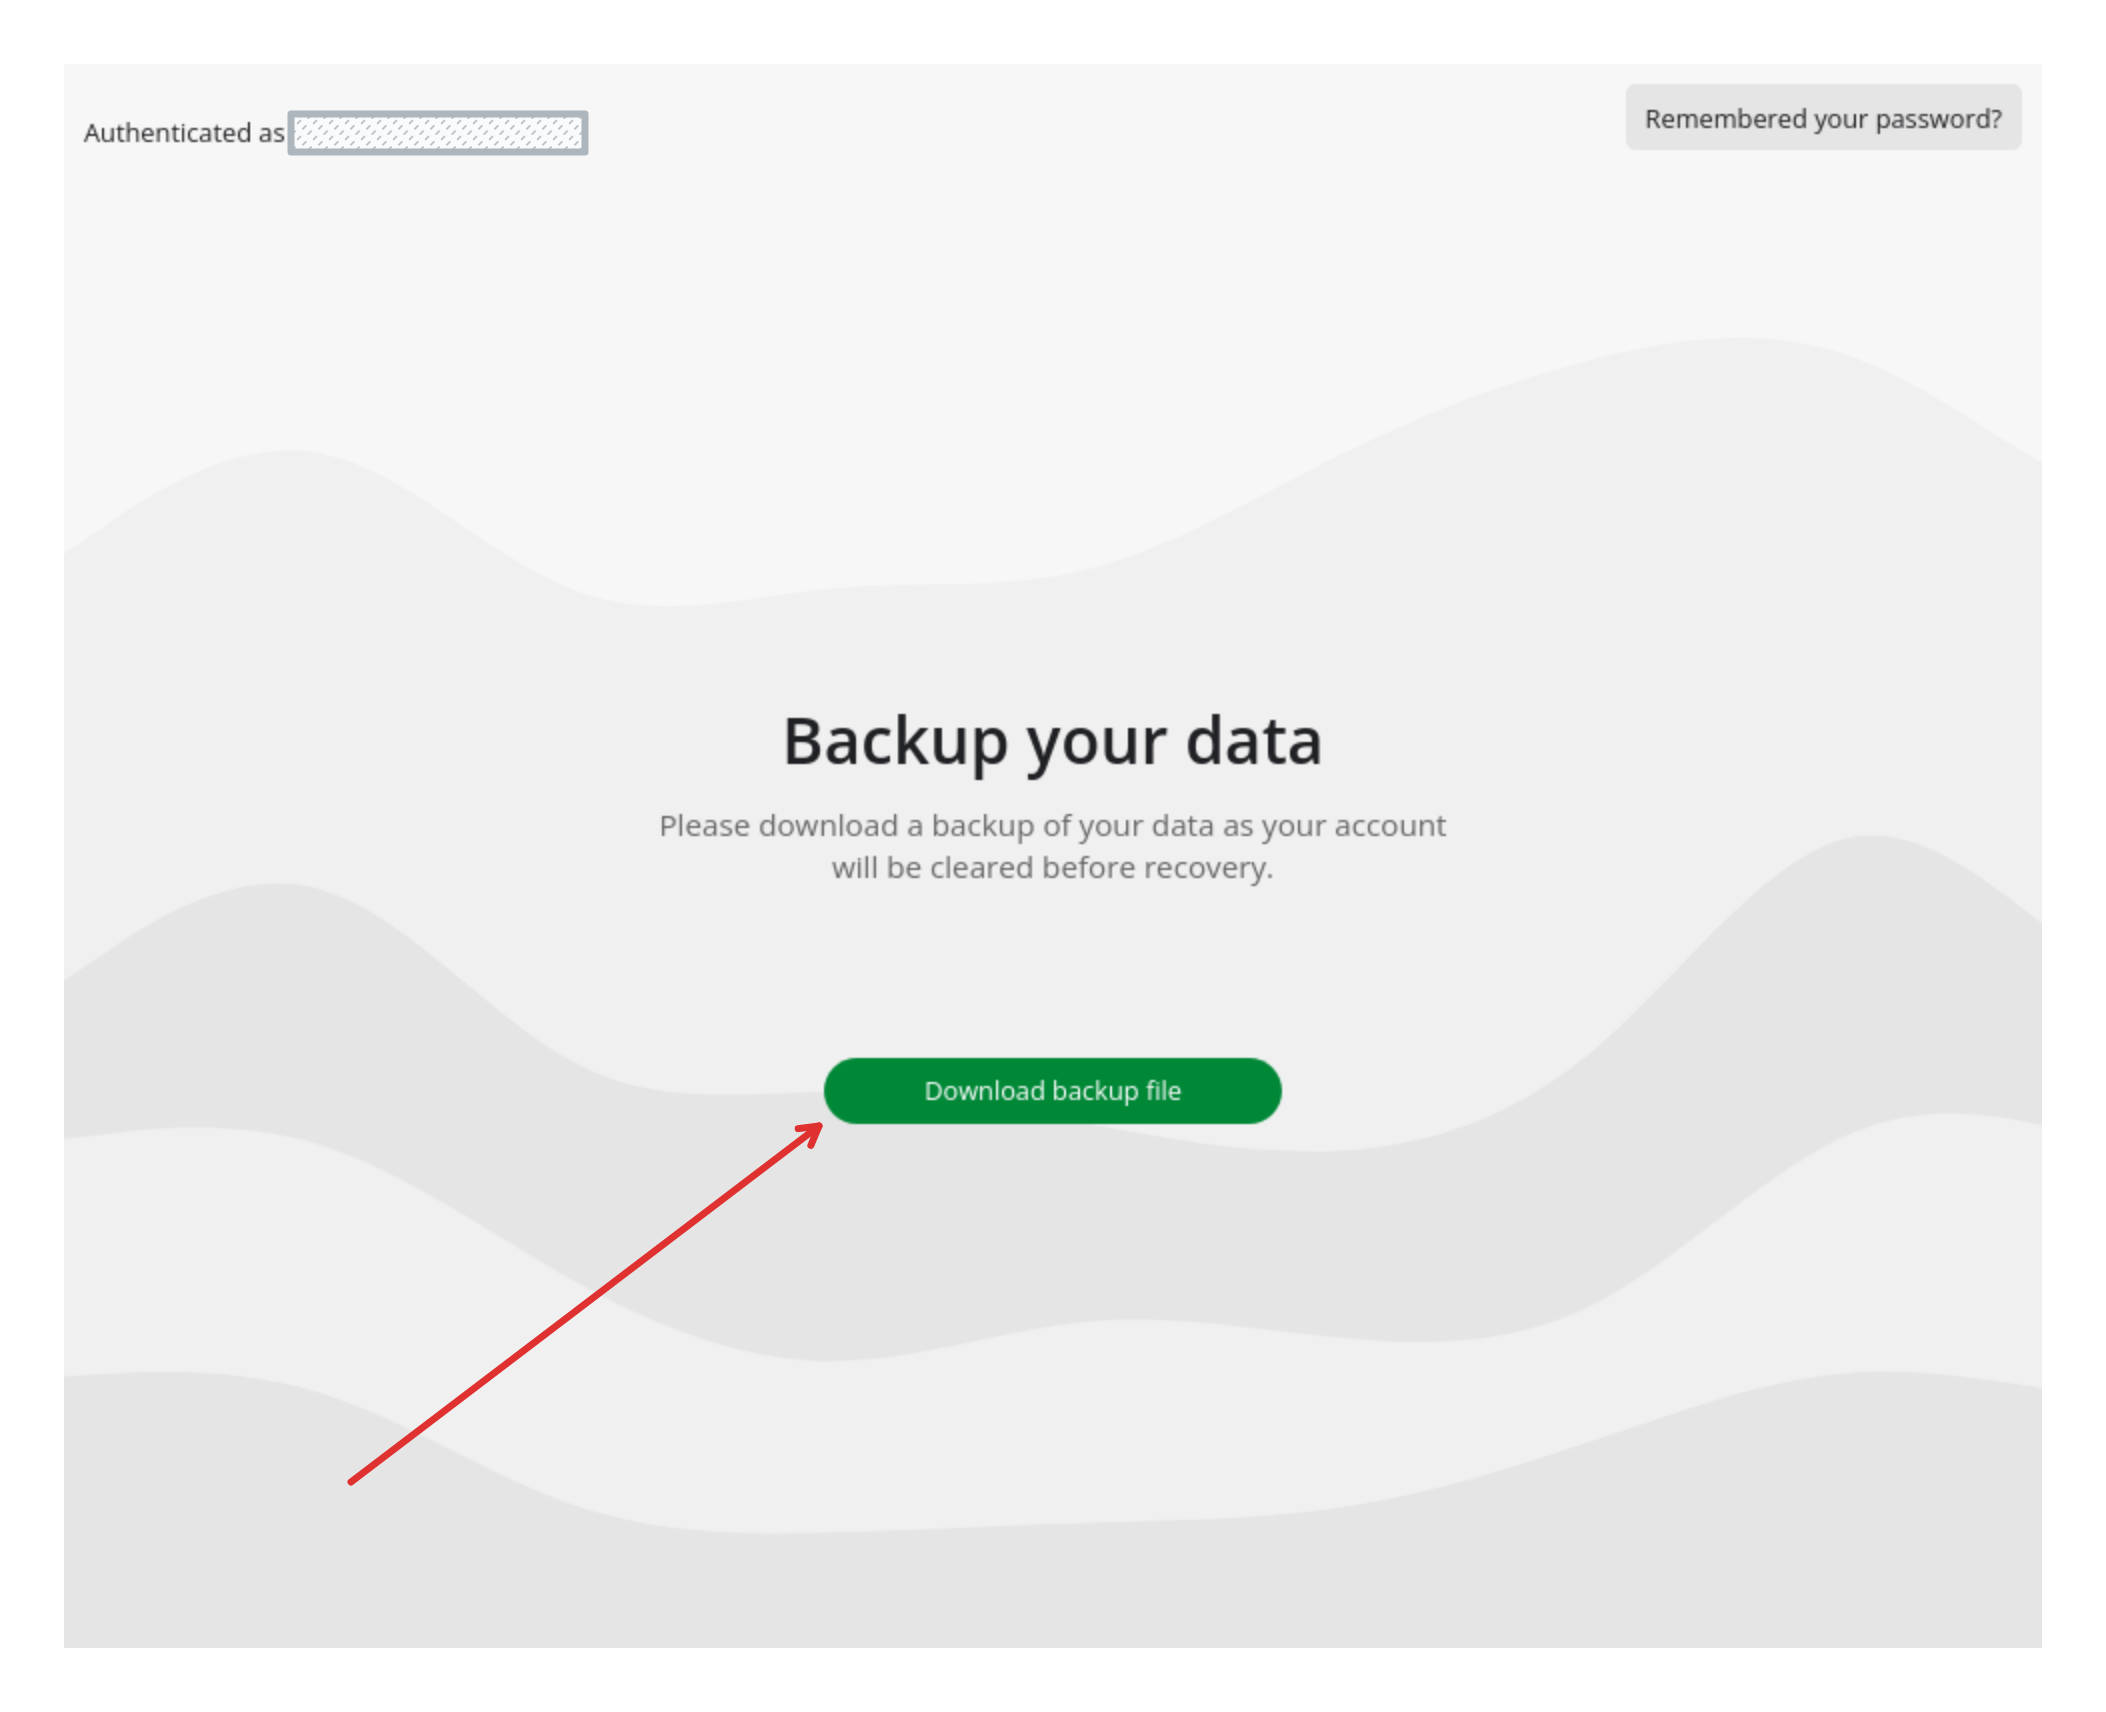
- For next steps, see Resetting account password section
Clear data & reset account
RISK OF LOSING DATA
This method will clear all your data including your notes, notebooks, reminders, tags etc. Proceed with caution.
- Click on the third option (the button that says
Clear data & reset account) - For next steps, see Resetting account password section
Resetting account password
Once you have selected the appropriate account recovery method, you’ll be asked to choose a new password.
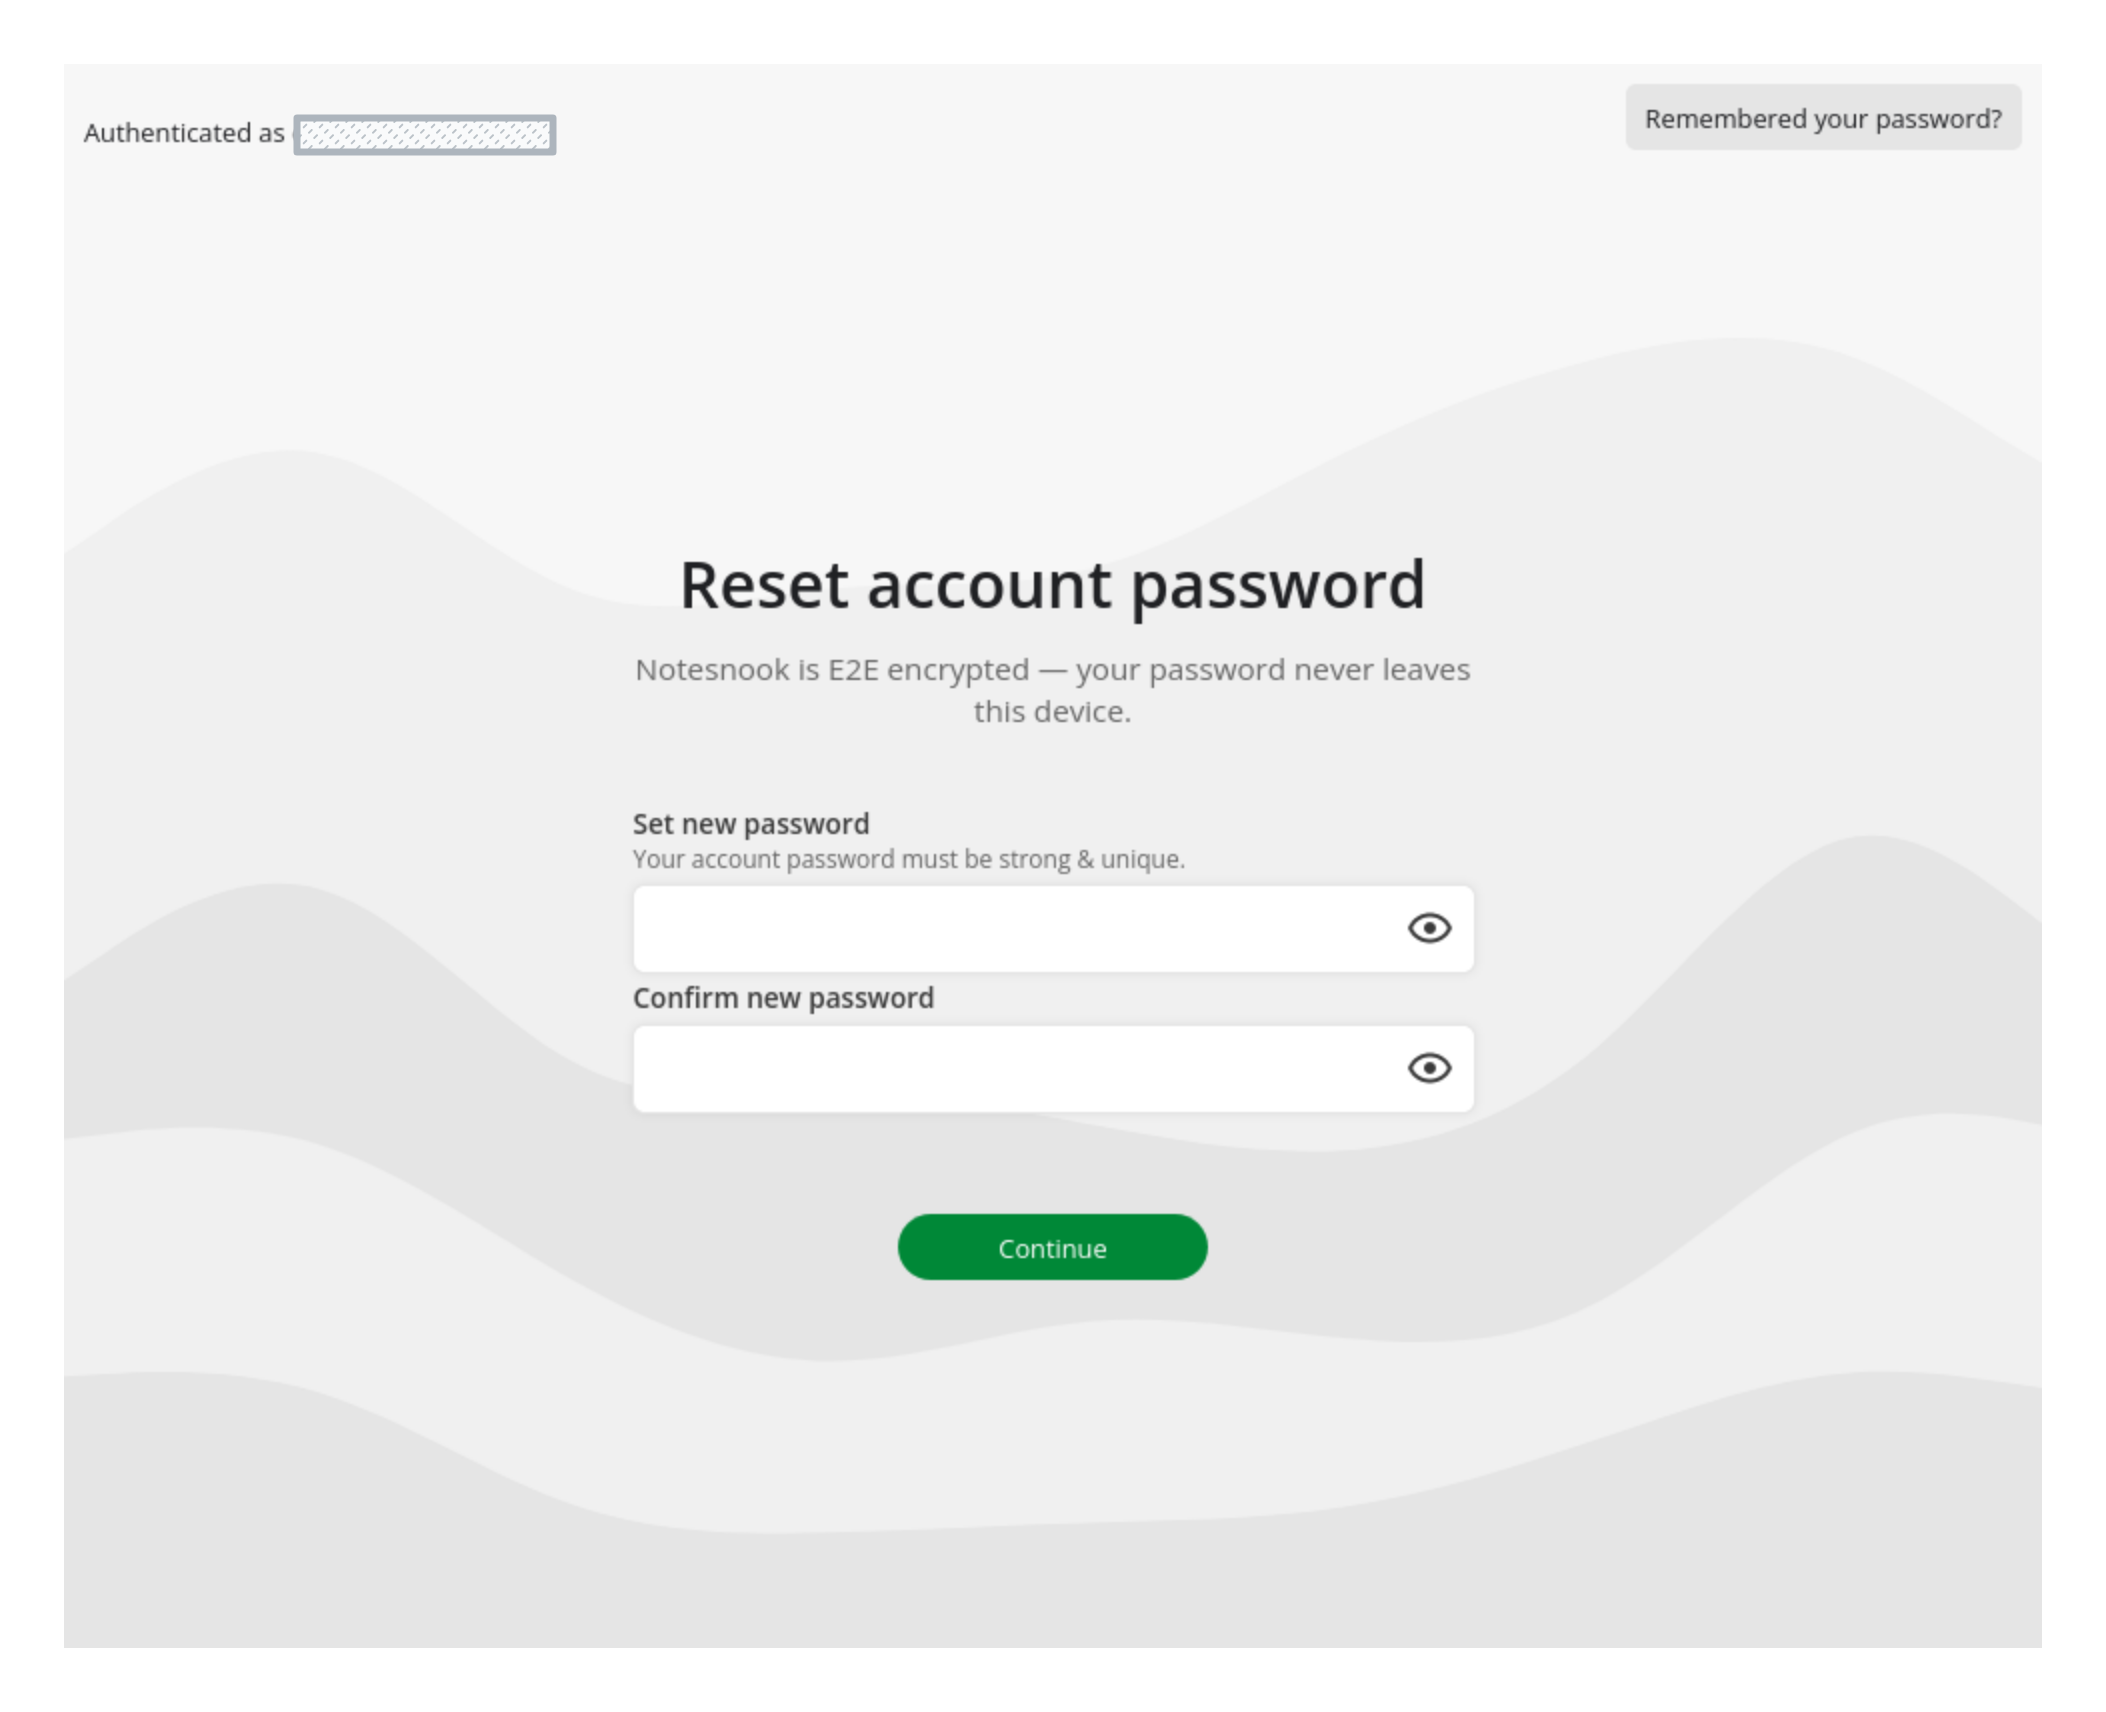
- Choose a strong & memorable password. We recommend using a password manager like 1Password or Bitwarden so you never lose your password again.
- Click on
Continueand wait until the process finishes. - Save the new recovery key when prompted in a safe place.
And that’s it. You have now successfully recovered your account. Feel free to relogin on all your devices so you can sync & access your notes.
Troubleshooting
I am getting “ciphertext cannot be decrypted using this key” error during sync
This usually happens when some of your data is still encrypted with your older key. It is very rare, however.
The only way to recover from this corruption is to reset your account.
I am getting “Sync server is not responding. Please check your internet connection…” error
The main cause of this error is our server getting timed out when clearing your data. If you have a lot of data (in GBs) then you might face this.
As a work around, try again from a laptop using Google Chrome or Mozilla Firefox. However, there’s a very low chance that it’ll work. Unfortunately, there’s no easy way around this. We are working on mitigating this ASAP.